
Overview
Welcome to the Helios Vision AI customer portal: what it does, the roles, and a linked map of every module in the sidebar.
Objective
Helios Vision AI is one AI brain for every customer conversation. You build AI agents once, connect them to your channels, and they answer on WhatsApp, Instagram, TikTok, phone calls, email, web chat, Messenger and Telegram — 8 native channels in total — reading from your documents and data, and taking action through your integrations. You stay in charge: any conversation supports one-click human takeover, and every action respects the plan and permissions of your workspace.
This portal is where you set all of that up. This page is a map: what each module is for, and where to go next.
Access
- Sign in and access — how logging in, sessions, and workspace access work.
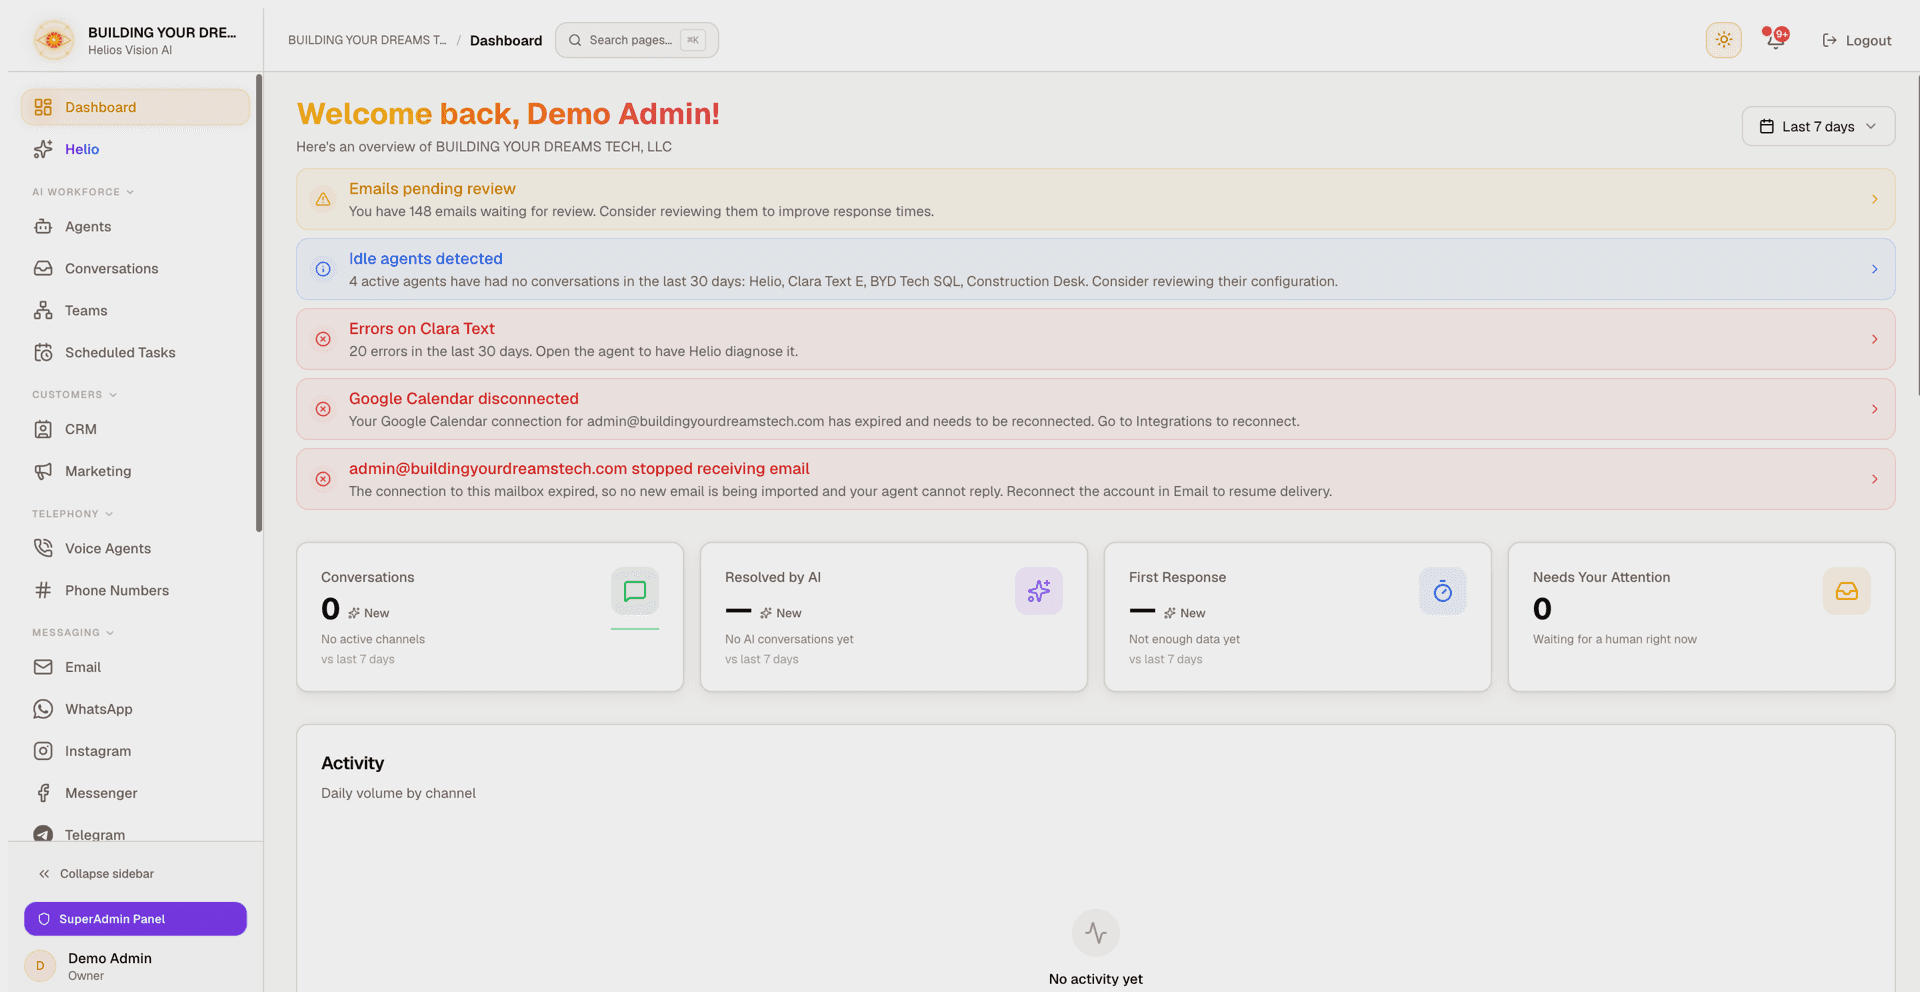
- The sidebar is your main navigation. Its labeled sections can be collapsed and expanded by clicking the section title; your choices are remembered, and everything starts expanded so a new workspace sees the whole product. On desktop, the Collapse button at the bottom shrinks the sidebar to an icon-only rail.
- Press Cmd+K (or Ctrl+K) to open the command palette and jump to any page by name. It shows exactly the pages your sidebar shows — nothing more, nothing less.
Roles
Every workspace member has one role, and it controls what appears in the sidebar and what you can change:
| Role | What it can do |
|---|---|
| owner | Full access, including billing and plan. |
| admin | Full access to modules and settings; manage members. |
| agent | Build agents and knowledge, work conversations and the CRM. |
| viewer | Read-only access to the Dashboard. |
You only ever see data for the workspace you belong to. Marketing, Phone Numbers, Reports, Members, and Settings are limited to owner and admin (see each module's page).
Prerequisites
- A workspace and a role in it (see Access above).
- Choose your plan — pick a plan and unlock the modules and channels it includes.
- An AI key (API keys, BYOK) or the AI credits included on paid plans.
What Helios does
- Answers customers automatically across 8 channels with a consistent voice, in the customer's language.
- Keeps a human in the loop — supervise, edit, approve, or take over any conversation from a unified inbox.
- Reads your knowledge — agents ground their answers in your documents and query your data tables in plain language.
- Takes action — through webhooks and integrations (Google Calendar, Gmail/Outlook, and more), agents can book, look up, and update on your behalf.
- Grows into a workforce — organize agents into Teams and run recurring Scheduled Tasks.
- Shows results — a live Dashboard, Reports, and a built-in CRM turn every conversation into pipeline.
Portal map
The sections below mirror the sidebar, top to bottom.
Top of the sidebar
- Dashboard — your workspace home: adaptive KPIs, activity charts, smart alerts, and your open tasks. The one page every role sees.
- Helio — the built-in AI co-worker, rendered as a distinctive entry right under Dashboard. Ask it to build agents, set up data, or explain what to do next — it works inside your workspace and never leaves it.
AI Workforce
- Agents — create and configure agents: channels, capabilities, model, and system prompt.
- Conversations — the unified inbox to supervise every agent's conversations across all channels, with human takeover. You can filter it down to a single channel.
- Teams — orchestrate multiple agents that hand off and collaborate.
- Scheduled Tasks — have an agent run on a schedule (reports, follow-ups, checks).
Customers
- CRM — a searchable contact list, a drag-and-drop sales pipeline, custom fields, and optional AI lead scoring. Your agents read and update these contacts automatically.
- Marketing — outbound messaging campaigns (owner/admin). Rolling out gradually; contact support if you don't see it yet.
Telephony
- Voice Agents — agents that answer real phone calls, powered by your phone numbers.
- Phone Numbers — buy and manage the numbers your voice agents answer on (owner/admin).
Messaging
- Email — connect Gmail or Outlook and let agents draft, send, and review email with a human-review queue. Rolling out gradually per workspace; contact support if you don't see it yet.
- WhatsApp — connect a WhatsApp number and manage conversations. See WhatsApp setup for the step-by-step Meta connection.
- Instagram — reply to Instagram DMs.
- Messenger — reply to Facebook Messenger conversations.
- Telegram — connect a Telegram bot.
- TikTok — auto-reply to public comments by keyword.
- Web Chat — manage the chat widget for your website; the conversations themselves live in Conversations. See Web Chat widget for installation and appearance.
Integrations
- Integrations — connect external services (Google Calendar, Gmail/Outlook, and more) for agents to use.
- Webhooks — outbound actions your agents call over HTTP, and inbound endpoints that trigger an agent.
Knowledge
- Documents — upload files as a knowledge base your agents search when answering.
- Data Tables — structured tables your agents query in plain language, with CSV import/export and templates.
Admin
- Reports — metrics and analytics across channels and agents (owner/admin).
- Members — invite people and assign roles (owner/admin).
- Settings (owner/admin) — one sidebar entry with several pages inside:
- General settings — workspace name, language, timezone, and branding.
- Categories — the labels used to organize conversations and contacts.
- Notifications — system alerts and where they are delivered.
- Gmail connection — connect a Gmail account for the Email module.
- API keys — bring your own AI provider key (BYOK).
- Twilio setup — connect Twilio for voice and phone numbers.
- Billing and usage — plan, invoices, and AI-credit usage (owner).
Recommended setup flow
- Choose your plan so the right modules and channels appear.
- Add your AI key (BYOK) under API keys, or use the AI credits included on paid plans.
- Create an agent and give it a personality and a system prompt.
- Add knowledge — upload Documents and/or create Data Tables, then assign them to the agent.
- Connect channels — WhatsApp, Web Chat, Telephony, and any of the Messaging channels available to you.
- Add integrations and webhooks if your agent needs to take action in other systems.
- Test the agent, then watch results in the Dashboard, Conversations, and Reports.
Good practices
- Follow the setup flow in order: plan and AI key first — an agent without a model behind it cannot answer.
- Use Conversations as your daily cockpit instead of visiting each channel page; the channel pages are for connecting and configuring, not for reading messages.
- Keep sidebar sections expanded while you learn the product; collapse them once you know where everything lives.
- Use Cmd+K / Ctrl+K to move around — it is the fastest way to reach any page.
Common errors
- A module is missing from my sidebar. Check your role first: viewers only see the Dashboard, and Marketing, Phone Numbers, Reports, Members, and Settings require owner or admin. Marketing and Email also roll out gradually per workspace — if your role is right and the module is still missing, contact support.
- A whole section disappeared. It is probably collapsed — click the section title (the small chevron rotates) to expand it again. Sections with no visible items for your role are hidden entirely.
- The sidebar only shows icons. It is collapsed to the icon rail; use the expand button at the bottom of the sidebar.
- Module names don't match this documentation. This documentation uses the English UI labels; if your workspace language is Spanish you will see their Spanish equivalents.
Related
- Dashboard — the first page you land on.
- Helio — the fastest way to get set up: ask it what to do next.
- Agents — start building here after choosing a plan.
- Choose your plan — what each plan unlocks.